Posted by Ronnie Humphries on 31 August, 2016
|
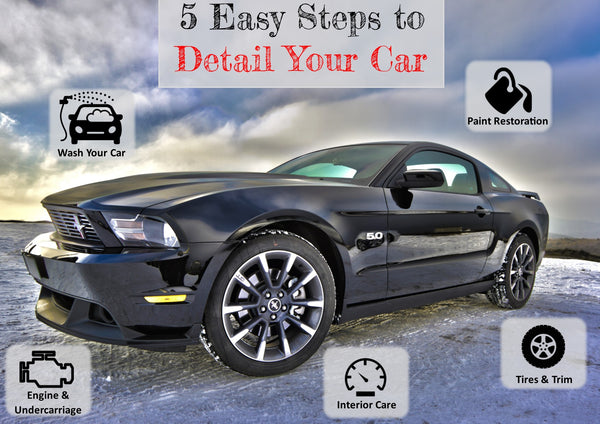
We all want our ride to look and perform its best. One of the simplest ways we can go about this is by keeping it, and all its parts, clean. Keeping your car clean helps keep the finish looking new, and will help to prevent damage from the elements. These are our five steps to detail your car.
Detail Your Car in Five Easy Steps
For those days that you want to forgo the professional detailer, and get your hands a little sudsy. Here’s the quick-and-easy on how you can go about getting your vehicle to look in tip top shape.
1. Exterior Prep and Clean
-
Try to wash your vehicle in a cool, shady spot. This helps to reduce the suds drying onto the paint.
-
Begin the car wash process with two buckets. One is for your shampoo solution and the other is clean water to rinse your wash mitt. The majority to swirl marks are caused from grit (sand, dust, particles) embedded in the wash mitt.
-
Fill your buckets. One with a high-quality car shampoo and the other with clean water.
-
Pro Tip: Throw a Grit Guard into the bottom of each bucket.
-
Thoroughly rinse the exterior surface of your vehicle. This will cool down the surface, while removing some the loose dirt and grime prior to washing.
-
Begin the washing process by cleaning the wheels, along with the wheel wells. This will allow you to wash off any of the chemical overspray from the paint.
-
Pro Tip: Use a pump sprayer to easily apply the wheel cleaner/degreaser.
-
Load up that wash mitt with some car shampoo (from the sudsy bucket), and wring it out over the surface you are about to wash.
-
Wash your vehicle from top to bottom (except for the wheels).
-
Wash in straight, overlapping lines, using both sides of your wash mitt.
-
Rinse each section once you have washed it. You don’t want the suds to dry on the paint.
-
Use a bug sponge and appropriate cleaner to remove any accumulated junk (i.e. bug splatter, overspray, road grime).
-
Thoroughly rinse off all the suds, allowing the water to sheet off the vehicle.
-
Use a high-quality chamois to gently dry the surface with straight, overlapping swipes.
-
Remove any remaining droplets or streaks with a micro-fiber towel.
2. Tires, Trim & Moldings
Clean and Preserve those Tires
-
Have a designated tire/wheel cleaner, as opposed to any household degreaser or cleaner.
-
You’ll also want a quality tire brush, along with a wheel brush based on the type of rims you have.
-
Pro Tip: Soak the brushes in wash solution to soften the bristles.
-
Thoroughly rinse the wheel and wheel-wells first.
-
Spray the wheel and tire down with cleaner and let set for a few minutes.
-
Clean the tires first, using the tire brush.
-
Next, use a wash mitt or wheel brush to clean the rims.
-
Pro Tip: A small brush works well to hit the nooks and crannies near the lug nuts.
-
Rinse thoroughly . . . repeat three more times.
-
Apply a quality dressing to preserve tires, while enhancing the look.
-
Pro Tip: Don’t over-apply the dressing, or it will ‘sling” on to the paint around the wheel-wells.
-
Check out this post if you need to polish those wheels.
Clean, Restore, and Protect the Trim & Moldings
-
The trim & moldings would have been cleaned during the wash process, but you a use little special cleaner and a brush to remove any stubborn grit and grime.
-
Rinse thoroughly and allow to dry.
-
To protect your freshly cleaned trim & moldings, apply either a water-based dressing, or Xtreme Shine.
-
A wax applicator can come in handy here.
-
If your plastic bits appear faded, you have a couple options:
-
For black, use Black Vinyl Coat to restore and preserve the trim.
-
For any other color, use Vinyl Magic.
-
Both products restore and preserve plastic pieces for up to 6 months.
3. Restore and Protect Your Vehicle’s Finish
-
Before you begin compounding or polishing your car’s paint, first prep the surface using Clay Magic.
-
Use a variable-speed orbital buffer when compounding/polishing your vehicle’s surface.
-
Pro Tip: Help avoid swirl marks by using a foam polishing pad to polish paint with a polisher.
-
Choose a polish or compound based on the condition of the paint.
-
Mild- Use a lightly abrasive polish like BC-2 for mild imperfections in the paint.
-
Medium- For heavier oxidation and swirl marks, use a more abrasive compound like GS-1.
-
Heavy- For heavy scratches (not to the metal) and paint defects or blemishes, use a heavy compound like XP Compound.
-
Polish small sections at a time, overlapping the sections to ensure complete coverage to finish the entire body panel.
-
Pro Tip: Don’t turn the polisher/buffer on until the pad is on directly on the paint.
-
Based upon the condition of your paint, you’ll step down to the next level of compound/polish.
-
Start with heavy compound, then move to a medium compound, followed up with a mild polish.
-
Pro Tip Make sure to remove any excess compound residue with a microfiber towel.
-
If the polish/compound did not contain a surface protectant, use a high-quality wax to give your paint a showroom shine.
4. Engine Compartment & Undercarriage Cleansing
Ungrime that Engine
-
Make sure engine is not hot, but warm to the touch.
-
Cover all electronics (distributor, sensors, wiring harnesses, etc.).
-
Soak engine and compartment with a degreaser, allow to sit for a few minutes.
-
Use a stiff brush to help remove the really baked-on stuff.
-
Using a controlled stream of water, rinse off the degreaser.
-
Allow to dry.
-
Apply water-based dressing to plastic housings, wires, and hoses.
-
-
Pro Tip: Use an aerosol detailer, like Platinum Shine, to add luster to any of the painted and metal surfaces.
Ungrit your Undercarriage
-
Elevate vehicle on jack stands, to get underneath.
-
Unless you have a monster truck, you my friend have it easy.
-
Use a pressure washer to blast off any and all debris that has accumulated under your vehicle.
-
Thoroughly coat undercarriage with degreaser, let sit for several minutes.
-
Use a brush to clean any heavily accumulated areas.
-
Rinse thoroughly, and allow to dry.
-
Add a protective barrier to your car’s bottom.
-
A rubberized undercoat is great for shielding your vehicle’s underbits from moisture and grime.
-
Pro Tip: You can also use a product like WD40 to help prevent corrosion on your car’s undercarriage.
5. Complete Interior Detail
-
Use a brush to get any embedded dirt out of the crevices.
-
Spray a multi-purpose cleaner, like Special Cleaner, onto all your hard surfaces (dashboard, door panels, door posts/jams, center console, etc.).
-
-
Pro Tip: Compressed air works great for cleaning out the vents.
-
To protect the hard surfaces from UV damage, use a product like Super Dress It.
-
Xtreme Shine works great for leaving a clean surface, without that slick feel. Its anti-static properties also repel dust.
-
Time to break out the vacuum.
-
Use a crevice attachment to remove the grit from those hard-to-reach areas.
-
Pro Tip: Lots of pet hair? Put on a latex glove and run your hand over the upholstery.
-
Use Super Foam to lift up any spots or stains on the carpet of upholstery.
-
Spray on.
-
Brush in.
-
Vacuum out.
-
Pro Tip: For specific stains (protein, oil, etc.) you can use and Enzyme based treatment.
-
Use Vinyl & Leather cleaner to remove any dirt from . . . you guessed it, vinyl and leather.
-
-
Apply your leather conditioner with a microfiber towel or a wax applicator.
-
Work the product into the leather, and wipe off any excess.
-
Pro Tip: Always use a quality conditioner with lanolin.


Comments