How to Guides

Common Detail Questions Answered

Common Detail Questions Answered
We've put together some of the top detail questions we receive. Below are nine answers to common detail questions and issues.


9 Common Detail Questions Answered

1. The Difference Between Wash & Wax and Real Wax

Most wash & wax car shampoos work more on the “wash” side of things than on the “wax” side.

Wash & Wax: Image of beaded water on car paint 

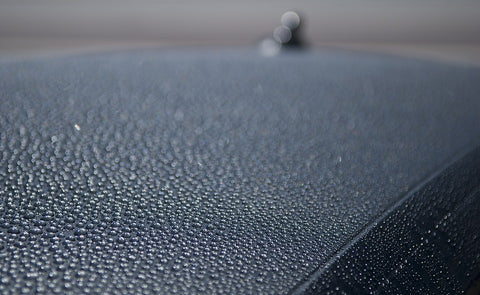
Generally, a wash & wax formula will contain a minimal amount of Diethanolamine or “amine”. This is a water-soluble chemical that aids in boosting the reflective/hydrophilic properties of the surface it is applied on.

Non-geeky Translation

Your paint should look a bit shinier after everything is all said and done.

Keep in mind that the purpose of waxing a vehicle is to add an extra layer of protection on the paint. This layer is primarily used to protect again UV damage and environmental contaminants.

If just using a was (even a wash n wax), you’ll be leaving your painted surface unprotected.

I would recommend a once-a-year treatment with a Polymer-based sealant. This will give that vehicle a nice shine, along with the peace of mind that it is ready to face the elements.

Follow-up your normal washes with a Quick Detailer, and that car vehicle will glow.


2. Easy Way to Wash a Vehicle in Temperatures Below Freezing

Please don’t go outside to wash your vehicle in freezing temperatures. You’ll likely end up with more of a mess than when you started. The freezing temps will seal your doors shut, keep the wash shampoo from being effective (may not even suds-up well), and you’ll definitely not be able to apply any form of wax or sealant.
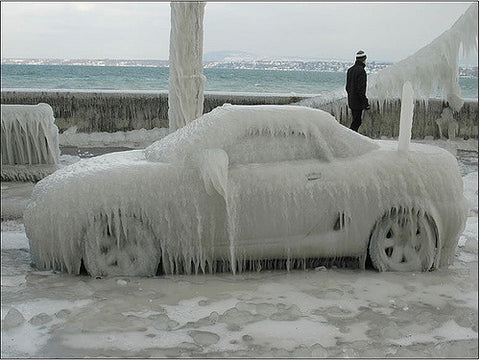
Wash car in winter image of frozen car

Instead

Get your car prepped before it is too cold outside, or find a way to wash it in a garage or warehouse where the temperature is above freezing.

Prepping your vehicle for the stormy, cold winter is something you want to plan for in advance. This is what we recommend: prepping your vehicle for winter.

I would recommend washing your vehicle just as you would outdoors, with the exception that you’ll try to use a minimal amount of water to get the job done . . . this will help clean up at the end.

To prep:
  1. Move anything off the garage floor that you don’t particularly want to get wet.
  2. Put some form of barrier in front of any interior doors, unless they have a raised threshold.
  3. Get all your wash essentials ready to go.

Wash your vehicle as you normally would.

Clean up:
  1. Open up the garage door and use a shop broom or floor squeegee to push out any of the pooling water.
  2. Dry mop any leftover water residue.
  3. Pat yourself on the back for a job well done.


3. My Car just got painted, now what

Typically, your vehicle paint should be dry within a few hours. But this is different from curing.

The color really isn’t an issue, but keep in mind a 2-stage paint job includes a second layer of protection via a clear coat.

Image of car prepped for new paint

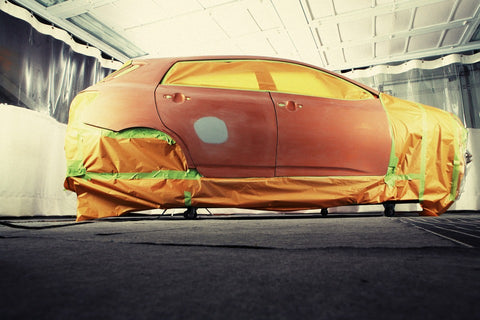
I think what most are looking for would be cure times. Most detailers and body shops will likely give you a 30–90 day “cure time”. This is the amount of time it takes for the paint to fully set and harden, giving your vehicle the full protective measures.

This 30 to 90-day period is also a time where you WILL NOT want to apply any other protective coating: wax, sealant, etc. The reasoning here is that you want the paint to be able to breathe, or gas-off any fumes from its application.

Now, you will be fine to wash the vehicle at this time (just don’t use a wash & wax type shampoo).

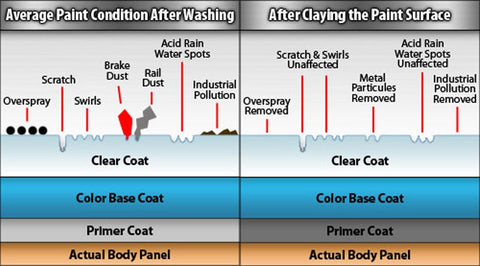
You may also elect to have paint correction via compound and polish during this waiting period. These abrasive compounds will clean up any of the paint imperfections, giving you that mirror finish. Just don’t follow this step up with a wax or sealant.

Once the curing time has passed, go crazy. I would recommend a polymer sealant, which will keep that finish protected for an entire year. Between washes, you can apply a quick detailer what will bolster the finish, while giving everything a nice shine.

Here’s a guide to properly protecting your vehicle’s finish year-round: Automotive UV Protection: Sunblock Your Car


4. Removing Glue from Paint & Glass

So, you got some glue on the pain, or windshield of your care. Well, there’s a solution for that.

Start out with denatured alcohol. Soak come into a rag and hold that on the glued area for a minute or two to soften things up. That should work it loose, then a little elbow grease will get you the rest of the way.

You can use a razor blade, as previously mentioned, but I wouldn’t recommend a metal one. They make plastic razorblades specifically for detail work, and that will ensure you don’t unexpectedly scratch anything.

You can also hit up a hardware store and grab some Goof Off and give that a try, following the same steps as above.

But what if it’s Gorilla Glue? Yep, also a solution.

Gorilla Glue removal with peanut oil

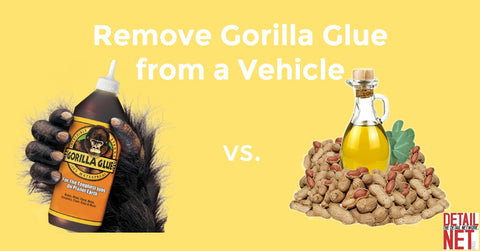
UPDATE: After digging a little more, and asking some chemistry buddies, it appears that Gorilla Glue doesn’t have a listed solvent. The manufacturer’s recommendation is to use peanut oil, which works surprisingly well.


5. Properly Vacuum Your Car

Keeping debris off the floorboard, seats, and fabric of your vehicle’s interior is more important than most think.

Properly vacuum car

  1. It will keep the inside newer, and for longer. Dirt and debris will only add undue wear to the inside of the vehicle.
  2. Some of that gunk isn’t dirt, but remnants of food and other whatnot. This can not only leave behind an odor but poses as a breeding ground for bacteria.
  3. Keeping things clean inside will protect all those electronics from excessive dust and gunk build-up.
  4. Finally, you’ll take pride in the fact that you did a good job.
Let’s get started:
  • Remove all trash that can be easily picked up and tossed in the trash. Use gloves if it’s that bad.
  • Take out any floor mats, portable accessories, and/or car seats. These can be shaken out and vacuumed while outside of the vehicle.
  • Vacuum it up. Use a front-to-back, or side-to-side motion. Overlapping often to ensure you got it all up.
  • If you have some dried mud (or other dried substance) you’ll need to follow that vacuum with some form of mechanical agitation (brush or cloth).
  • Don't add any liquids yet, just dry scrub the stuck-on stuff to loosen it up.
  • Follow that with another pass of the vacuum and you should be in a better position to start adding product.
  • If needed, use a fabric foam that can help pull up the remainder of that grime.


6. Best ways to remove Smell from a Vehicle

There are several ways to remove unwanted scents from a vehicle, it all really depends on what is causing the funk.

I wouldn’t bother with general car fragrances, as they will just overpower the scent for a time but won’t do anything to truly get rid of it.

Smelly car

The best way is to remove/neutralize the odor. There is a company (Auto Scents) that makes an Odor Bomb that will work for the run of the mill scents like food, dirty clothes, and whatnot.

Take it up a step with an enzyme-based odor eliminator. These work by breaking down the substance that is causing the smell. If you have a particular spot or spill that you know is the cause than these will work quite well.

On the extreme end, you can take it to a shop that offers an Ozone treatment. This is very effective but will run $100–300.

To do it yourself, I would suggest a product called Auto Vaccine. This is actually an odor neutralizer, as it uses chlorine gas to eliminate stubborn smells.

Again, this is for smells that are on the interior of the vehicle. To purge the interior, you’ll have to neutralize the odor, and the chlorine gas works wonders.

There is a sponge that you wet and insert the chemical packet. Turn the A/C on high, close up the windows, and let it work for the allotted time. Then, open the windows and doors and let that sucker air out.

Please do not place yourself in the vehicle while the product is working, that is bad.


7. Clean your Windows without leaving streaks

One of the best ways to keep the window from streaking is by using a clean, microfiber towel. Pair that with a quality glass cleaner and you should be good to go.

Most people mess up with a towel/rag that has some previous substance on it. Then they start cleaning the glass and smearing around whatever was on that rag.

Streaky windshield

Remember, if you plan on using the same glass cleaner on windows that are tinted, then you will want to stay away from formulas that contain ammonia. That’s a quick way to mess up your tint.

Also, ensure that you clean the glass after you apply a dressing on the dashboard. We’ve seen this happen so many times, where someone cleans their windshield and then sprays an Armor-All substance and gets splatter low on the glass. Clean the glass last.

After the glass is clean, you can add a protective coating that will help with fog and also remove any streaks left behind. Xtreme Shine works really well for this, and it can also be used for paint, chrome, and trim.


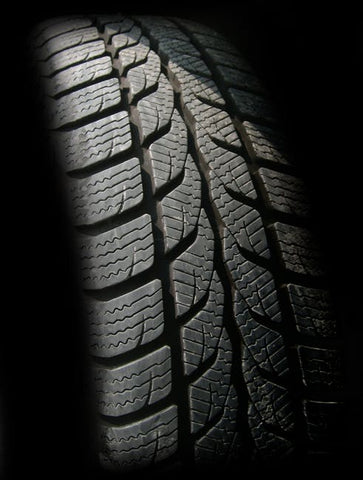
8. Water Based vs. Solvent Based Tire Dressing, what’s the difference?

Why do some tire dressings leave the tires extra shiny and we looking?

The easiest answer is that there are two types of tire dressings, water-based and solvent-based. The solvent-based dressings last much longer and look shinier than the typical water-based dressing that most people have at home.

image of tire tread

Water-Based Dressing

This is easily applied and will leave behind a clean, satin look. They are milky-white and contain natural oils, along with synthetic polymers which leave behind a UV coating and keep the tire moist. Expect them to last about a week or two, before they need to be reapplied. We recommend Super Dress It.

Solvent-Based Dressing

These dressings are going to be a bit thicker and will give the tire a wet, glossy finish. Because of the silicone-based delivery system (as opposed to water), they will also last longer and stand up better in harsh weather conditions. Check out our XP Cool Blue.

Once your tires are clean and dry, you want to ensure they last until the tread is gone . . . not until they dry-rot. This means you’ll be taking another step, which is to add a protective coating to your tires.

As with interior dressings and protectants, there are numerous choices. You want to ensure that the product you apply meets your desired needs and results.

Pro Tip: Don’t over-apply your tire dressing. Allow to sit for a few minutes, then wipe off any excess to prevent the product from ‘slinging’ onto the surrounding fenders.

Here's a post on how to properly Clean Your Tires, Polish Your Wheels.


9. Easy Steps to Restoring Faded Headlights

Headlight restoration is one of those things that people either love or they hate.

There are so many kits out there that claim to bring back a perfect finish but really are just scams. Doing it yourself is by far the best way to achieve the results you want.

headlight restoration

As long as you don’t mind a bit of elbow grease, you can bring back those faded and oxidized lenses in about 30 minutes.

Here we go

What you’ll need: 1000, 2000, & 3000 grit sandpaper (wet is best), some form of sealant (to protect from further degradation), optional polish (like a less aggressive rubbing compound).

Tape off the lights to keep the paint around your work area safe, you don’t want to end up sanding out some of your hood.

Start with the lower grit sandpaper, which will knock the bulk of the oxidation haze off. We recommend side-to-side sanding, followed by up-and-down to cover the entire headlight.

If wet-sanding, have a spray bottle with water and don’t be afraid to use it.

After the 1000 grit, you can then step down to the 2000 or 3000-grit depending on how things look. The 3000 will be the finest and really bring back the clarity of the headlight lens.

Optional: by hand or with a small orbital (even a drill with foam pad), you can apply a low abrasive polish to really make that lens sparkle.

Once the lens is sanded and polished, you’ll need to apply a sealant to protect the plastic from further oxidation and UV damage . . . otherwise, you’ll be doing this every few months.

We really like to use a Paint Sealant, as it is a polymer sealant that lasts for over a year. It goes on super easy and will protect all the hard work you just did.


Preparing a Vehicle for Winter [Storage]

Preparing a Vehicle for Winter [Storage]

Preparing a vehicle for winter storage doesn’t have to be a daunting or confusing task. Instead, think of it as a giving your vehicle a good detail and servicing right before putting it away.

Preparing a Vehicle for Winter [Storage] image of covered car in storage unit

Preparing a Vehicle for Winter

Winter is coming!

We’ve all heard that line before. But, there are times where we want to tuck our vehicle in for a spell . . . keeping it stored away from the elements.

There can be multiple reasons for packing up your vehicle for storage:

  • It isn’t meant to be driven in inclement weather (i.e. motorcycle in snow)
  • Extended trips (months abroad . . . yes, please)
  • You just want it put up till it’s warm and sunny out (nothing wrong with that)

Now that we know your ride won’t be in use for the near future, let’s dive in to some of the proper steps to take before locking that vehicle away. 

Why do you want your vehicle cleaned and serviced before putting it away? We’re glad you asked.

Having a clean vehicle (inside and out) will keep it looking newer longer. This helps to prevent corrosion and fading from environmental contaminants (one of the reasons you’re tucking that thing away in the first place) and ensuring everything will be tip-top and ready when you bring it out of storage . . . because you know you won’t be patient enough when rolling up that garage door in the spring.

To make things easier, we’re going to be breaking up your vehicle storage prep into three steps:

  1. Exterior
  2. Interior
  3. Drivetrain

Exterior Vehicle Prep for Storage

There really isn’t anything special (i.e. out of the norm) that you should be doing before your vehicle goes into storage. Instead, you’ll want to give it a quality wash and detail as you normally would.

Wash that Ride

We’re going to recommend the two-bucket method to wash that vehicle. This will ensure that any contaminants are removed before moving on to the next step. Select a quality car shampoo, and get to work.

It’s in the Details

Now that things on the outside are all clean, it’s time to take care of any paint errors that may need your attention.

Clay: If your paint has any contaminants, this is the perfect time to break out the clay bar. Toss a plastic baggie on your hand and run it over the finish, if it catches or feels gritty than a good claying is in order.

Compound & Polish: Once you’ve addressed any paint contaminants with your clay bar, then it is on to correcting any paint flaws. For any of the heavy stuff, we recommend using XP Compound, follow that up with some Car Glaze, or polish it out with BC-2, and you’ll have a smooth-as-silk finish.

Once all paint contaminants are removed and any flaws are corrected, then you are on to the good stuff.

Sealant: We’re going to suggest putting on the final touches with a polymer-based sealant called Awesome Gloss. Sure, you can go with a wax, but Awesome Gloss is formulated to provide a protective coating for over 1 year, this ensures that that finish will still be perfectly covered once you remove that vehicle from storage.

Boom! The outside of your vehicle has now been cleaned, polished, shined, and treated. You can rest assured that the minimal dust accumulation during storage will not hinder all your hard work. Likely, you’ll be rolling out a fresh-looking ride once that sun makes its appearance in the spring.

Interior Vehicle Prep for Storage

Just like you did on the outside, you’re going to want to get everything cleaned out and spiffed up in the inside of your vehicle.

  1. Throw out any trash that (ahem) may have found itself on the floorboards, seats, glovebox, etc.
  2. Get out the vacuum and really get the dirt/grit sucked up.
    1. Remember, use mechanical means before chemical means.
    2. If spots are visible after vacuuming, hit them with a spot remover and brush
  3. Clean any fabric/upholstery that looks dingy. Use an extractor machine or spray bottle and upholstery brush.
  4. Using an all-purpose cleaner, spiffy up all the plastics and trim (door panels, dashboard, etc.)
  5. Treat everything with a non-greasy, protective coating.

Double boom! That interior is now ready for the abuse to come when you pull that sucker out of storage. Bonus, you won’t open the vehicle up to find moldy fries in a couple months. 

Drivetrain Prep for Storage

I know, I know, we’re just a company that sells detail products. But . . . we’d like to toss in a few more tips to help ensure your ride will be safe and sound during its storage slumber.

Prior to storing a vehicle for any period of time, it is recommended that you (or your mechanic) give its bits and pieces a good servicing. This doesn’t have to be a monumental task, but just something that gets done on a regular basis . . . this time you’re doing it before storage.

Check all fluids, and change any that are required. This is where you give that vehicle a good oil change, and toss in any additives that might be necessary.

  1. Here’s a good post on treating your gasoline or diesel for long-term storage.
  2. Give it one good and final drive to circulate any new fluids and additives.
  3. Grease the necessary suspension components.
  4. Top off the tires to their recommended max PSI.
  5. Put the vehicle on jack stands or blocks if it will be sitting for and extended amount of time. This will help to preserve the shocks.
  6. Disconnect the battery, or connect it to a charger set to trickle.
  7. To cover, or not? That really is a loaded question. We recommend, if storing in a garage/space that is regularly used, to go ahead with a cover for the protection of impact with foreign objects.

Whamo! Not only will your vehicle look good when it comes out of storage, but it will be purring nicely and be ready to hit the road when its sentence of solitude is up.

Wrap-Up

As promised, nothing above should be out of the ordinary for anyone who takes pride in their vehicles. The purpose of doing these steps together is to ensure your vehicle is protected outside and in.

No one wants to face issues when removing their vehicle from storage, and the little bit of work up front can mitigate many of those issues.

Winter is Coming Meme in Preparing your vehicle for winter [storage] post

So, get out there and start prepping your vehicle for storage. Winter is coming!


Clay Magic: Improve and Preserve Your Vehicle's Paint

Clay Magic: Improve and Preserve Your Vehicle's Paint

What is Clay Magic?

Clay Magic is an auto detailing bar that deep cleans and removes surface contaminants like: tree sap, bug residue, paint overspray, road tar, brake dust, and plenty of other stubborn dirt-like substances. 

The purpose of claying your vehicle is to remove any contaminants that can degrade your vehicle’s finish, while preparing the surface for any final step product like a polish, wax, or sealant.


Why you should use Clay Magic

First off, claying your vehicle once or twice a year will put you in an elite class of those folks who truly take care of their vehicle's paint. Which will make you awesome!

Clay Magic will help improve your paint's finish by leaving a smooth-as-glass surface. By removing contaminants, your vehicle’s finish will be ready for any type of polish or sealer you plan on protecting it with. Plus, it is safe for all painted surfaces, including clear coat. Now your vehicle will be awesome too!

Paint Surface before and after use of detailing clay bar, Clay Magic

Secondly, Clay Magic is the original clay on the block. That’s right 90s pop fans, Clay Magic is just as cool as the very first boy band, New Kids on the Block! But seriously, Clay Magic was developed in Japan during the late 80s, then subsequently patented here in the good ol' USA.

You can be sure that if the label says Clay Magic (and the patent numbers are visible on the packaging), then you’ll be getting the best detailing clay out there.


How to use Clay Magic

Now that you’ve had a fun little lesson on what detailing clay is and why you should use it, let’s get into the nitty-gritty of removing the nitty-gritty from your vehicle’s finish.

Let’s get started shall we.

Wash your car. That should be a no-brainer, but you’d be surprised what would happen if we didn’t list that as the first step. This will ensure that the painted surface is as clean as possible, while being free of any loose dirt or grime.

Feel for contaminants.  There are many times where you’ll be able to feel the contaminants right away using the back of your hand (kinda rough and gritty). You can also use our fun, non-patented trick called the Plastic Baggie Method: get a plastic baggie, put your hand in the baggie, run you hand (still in the baggie) over the paint. This little trick helps to accentuate the feel of the surface contaminants, and it is usually pretty surprising to most at what is hidden on the paints surface.

Prep the Clay Magic. We recommend breaking your clay bar in half, or in quarters. This will ensure that you have a nice chunk to work with, but if you drop it you’ll have spares. *Never use clay that has been dropped on the ground, the dirt it picks up will scratch your paint.

Use a quality clay lubricant. Spray a small section of the paint with the lubricant (a 2’ x 2’ patch works well). You can also spray the lubricant directly on the detailing clay to help with pliability.

Use light pressure. You’ll want the clay bar to glide over the area of the paint you are working on. Use overlapping, side-to-side or up-and-down motions to thoroughly prep the area you are working on. You can even get crazy and go side-to-side then up-to-down. Try not to use too much pressure, you don’t want to grind and smash the detailing clay into the paint.

Wipe it up. After you have finished claying a section of the paint, you can wipe off the detail lubricant with a clean microfiber cloth.


Clay Magic Tips and Tricks

  • Use a plastic bag to help feel if your paint is contaminated

  • Using a quick detailer that provides a slick surface

  • Keep the working area small, so the lubricant doesn’t dry up.

  • Press lightly, let the clay bar glide across the lubricated surface

  • Using a fine grade clay bar is ideal for most vehicle finishes

  • If you must use a medium grade clay bar, plan to follow up with a good polish (it will likely leave behind some marring)

  • Direct sunlight can cause the clay lube does not dry up too quickly

  • A 200g Detailing Clay Bar will make four pieces

  • If dropped, throw that piece away

  • Knead and reshape the clay often, exposes a clean surface of the clay

  • Re-wash your vehicle after claying, this will help remove any residue and loosened contamination

  • Clay can also be used on: glass, wheels, and plastics

  • For storing your clay bar, spray some of the lubricant in the container to help keep is soft and flexible

PLEASE, PLEASE, PLEASE! If you drop your detailing clay on the ground you MUST throw it away! Seriously folks, it will collect dirt from the ground that will scratch your car! 

Automotive UV Protection: Sunblock Your Car

Automotive UV Protection: Sunblock Your Car

It’s that time of year where we like to get outside and spend some time in the sun. It is also that time of year where we need to ensure our ride is protected from those harmful, paint degrading, plastic fading, UV rays. It makes sense to put something on ourselves to protect from sun damage, so let’s looks at some sunblock for your car and figure out the best solutions for automotive UV protection.

Automotive UV Protection: The Basics

DetailNet image of sun's radiation. Automotive UV Protection

We’re going to assume that your vehicle is already clean and the paint/trim/interior is in good condition. If not, we’ve got you covered in some other posts.  

Paint Sunblock: UV Protection with Waxes and Sealants 

When it comes to your painted surfaces, there are plenty of choices for UV protection. Not to make life any more confusing, we’re going to break down our top performers when it comes to preventing UV damage to your vehicle’s exterior.


Awesome Gloss- SPF 100 for your vehicle’s exterior and excellent auto UV protection. This polymer-based surface protectant goes on like a wax, but protects like a sealant. You can apply it by hand, or with a machine (think orbital buffer or variable speed polisher). Once applied, you are good to go for a minimum of 12 months (yeah, it’s that good). Its life can be further extended with an application of a quick detailer every couple of weeks.


Banana Magic- For those of you that just enjoy the process of waxing your vehicle every month (or two) then this carnauba cream wax is a great choice. Applies easily with a wax applicator, and buffs out with a microfiber, to leave a quality gloss that will make your vehicle glow in the sun. Bonus, it really smells like bananas and your car will be ready for a day at the beach.


Xtreme Shine- If you want quick, easy, and spotless, then this is a great go-to product. It sprays on like a detailer, but contains a polymer protectant that provides a UV barrier between the surface of your vehicle and those harmful rays. It can also be used on plastic trim, chrome, glass, and interior. Xtreme Shine makes summer car care a breeze.

DetailNet image of faded Italian car. Automotive UV Protection

Got faded paint? Depending on the level of damage, you can bring it back to life with a compound or polish. Then, treat it with one of the recommended products above.


Trim Treatment: Eliminating UV Damage to Vehicle Plastics

If you have any amount of plastic trim on your vehicle, then you know how easily it can begin to fad after its been blasted with those pesky UV rays. So whether you are trying to avoid fading, or restore an already faded trim piece, we’ve got some solutions for you.


Vinyl Magic works wonders for mild fading, you can easily use it to bring life back to that baked (think sun damage) piece of plastic. Vinyl Magic restores color, and provides a protective coating on the trim piece for several weeks.


Remember Xtreme Shine? Yeah, that stuff rocks. Give your plastic bits a quick spritz and wipe-down, then they’ll be covered with a great UV protectant. This product works as a great preventative, keeping your ride looking new while adding an invisible layer of vehicle sunblock.  


Protecting our Vehicle’s Feet: UV Protection for Tires 

We don’t always give our tires the love they deserve. Yeah, they are dirty by being constantly bombarded with dirt, grit, and road grime, but they deserve a good bath and UV protection just like the rest of your car.


By taking care of your tires, you’ll be extending their life, while staying safe on the road. Just think, there is no need to have a flat because of dry-rot and sun damage . . . we’ve got an easy fix for that.


XP Cool Blue is a great hybrid style dressing. It’s water-based, but works similar to a solvent-based dressing. This combination adds luster and UV protection. Apply as you would any dressing to those rubber feet on your vehicle and they’ll be happy you did. As an added bonus, XP Cool Blue works great for the interior and trim as well.

 DetailNet Image of old truck with sun shinning down. Automotive UV Protection

So there you have it . . .  a few great products that will not only make your ride look that much sweeter, but also protect it from those harmful UV rays.

How to Clean the Engine Compartment & Undercarriage

How to Clean the Engine Compartment & Undercarriage

Why You Want to Clean the Engine Compartment and Undercarriage

You can definitely expect to find a good deal of dirt, grease, and grim in the engine compartment and on the undercarriage. The heat, fluids, and exposure to road elements all add up to a big mess when left unchecked. Keeping your engine compartment and undercarriage clean will help things run properly, while making it easier to check for any type of fluid leaks or malfunction.


We know this is the less desirable side of cleaning your vehicle, unless you have a showroom piece that sits around with its hood always up. But have no fear, we’ll get you through this while leaving your car’s nether regions in much better shape.


Engine Compartment

Prior to blasting your vehicle’s engine with a bunch of water and chemicals, it is best to go ahead and remove as much debris as possible with compressed air (a brush will work too if you don’t have a compressor). Once done, you can move on to the next step of protecting the electronics.


You’re going to want to cover up the sensitive areas (sensors, distributor, etc.) with some plastic baggies, held in place with rubber bands or tape. This will help to prevent water from fouling anything up. Once that is done you can begin the process of getting the motor compartment spick and span.

  • Apply engine degreaser, let sit for 3-5 minutes.

  • For heavy accumulation of grease and grime, use a brush to aid removal.

  • Rinse off degreaser with a controlled stream of water (watch those electronics).

  • Allow engine to dry thoroughly.

Pro Tip: The best temp to degrease and engine is warm to the touch, but not hot. Let the vehicle run for a minute or two, that will help loosen up the grease and grime.


Dress Up that Engine and Compartment

Now that your powerhouse is all cleaned up, you’ll want to keep those parts protected and looking sharp. There are a few options available, but to keep it simple you’ll be using a water-based dressing to spiffy it all up.

  • Apply dressing to plastic housings, wires, and hoses.

  • Wipe off any excess with a microfiber towel.

Pro Tip: To add a quick shine to the metal and painted surfaces, you can use an aerosol detailer like Platinum Shine.


Clean Your Car’s Bottom

Your car’s bottom often goes overlooked. Let’s face it, your gonna have to give your car’s bottom some needed attention. All that dirt, grime, and salt (hello friends to the North) from the road will wreak havoc when left unchecked.


Here’s the quick-and-dirty on how to get the dirty off your undercarriage.

  • Use a pressure washer to blast off any and all debris that has accumulated under your vehicle.

  • Thoroughly coat undercarriage with degreaser, let sit for several minutes.

  • Use a brush to clean any heavily accumulated areas.

Bonus: Check out this link for a DIY Undercarriage Pressure Washing System.


Preserve and Protect Your Undercarriage

Once your vehicle’s undercarriage is clean and completely dry, you can begin the process of adding a layer of protection. The primary concern here is water. Your goal will be to help reduce the likelihood of rust and corrosion by treating your car’s undercarriage by creating a barrier against moisture.


Option one is applying a rubberized undercoat, or undercarriage paint, to any of the surfaces that are not related to the drivetrain (i.e. engine, transmission, exhaust). You’ll want to ensure that there is no grease or water on the surface that will be treated. The product works just like an aerosol paint, and adheres to the majority of materials that make up your car’s underside.


Option two is to simply treat the underside of your vehicle with a WD40 type solution. This will reduce the likelihood of rust and corrosion on all those parts closest to the toad. As with the rubberized coating, avoid spraying any parts that will heat up, which will burn off the oil and create a stink.


Troubleshooting Advice

Here are some common problems that we face when cleaning and detailing our engine compartments and undercarriages.


Oil, Grease, & Tar

This is almost a given when cleaning your vehicle’s nether parts. For the above, that wouldn’t move on with a pressure washer, you’ll want to give the following a go.

  • Soak the affected area with a solvent or uncut degreaser.

    • Solvents cannot be shipped, so pick them up from your local hardware store.

  • Agitate the greasy mess with a stiff brush, helping to lift off the grime.

  • Rinse and repeat as necessary . . . the pressure washer should be more effective now.

Pro Tip: Keep you clay bar clean by brushing it with a toothbrush under a stream of water to remove the contaminates. This will ensure your clay will keep living up to its potential.


Overspray from Rust Proofing or Rubberized Undercoat

We get it, you took our advice and applied a coating to your vehicle’s undercarriage to protect from the elements. But you got a little carried away, and now some of that coating is on the vehicle’s exterior paint. We applaud your effort, and have an easy solution to make things right again.

  • Break out your favorite Clay Magic

  • Make sure you use a quality lubricant while claying.

  • Rinse thoroughly and enjoy the fruit of your labor.

Engine Insulator Pad Looks Trashy

Being enclosed that close to the engine can put a ton of exposure wear on the insulator pad. For the cases that it looks trashy, but isn’t actually falling apart, we can add a little life back into it.

Pro Tip: If you’re really feeling adventurous, you can remove the insulator pad and paint/dye it outside of the engine compartment.

Restore Your Car's Finish: Compounds, Polishes, and Wax

Restore Your Car's Finish: Compounds, Polishes, and Wax

Why Might Need to Restore Your Car's Finish?

Being exposed to the sun causes your vehicle’s painted surface to begin fading. Though today’s clear coats and UV treatments have lessened the amount of oxidation, paint can and will still fad.


The sun, weather, and other contaminants can degrade the top coat, causing a loss in clarity of your vehicle’s painted surface. If allowed to continue, the paint will become dull, losing all of its luster.


Pro Tip: Want to know if you even have a clear coat? Look at the applicator pad when applying a compound, polish, or wax. If it is the color of your vehicle, then you don’t have a clear coat.


How Severe is your Vehicle’s Finish?

Let’s think of your vehicle’s finish as a traffic light. Green is pretty good, with only some mild issues. Yellow will require more attention, but is still easily treated. Red . . . you’re going to be doing a bit of work here.

  • Green: New or used paint with superficial to light scratches and/or surface contaminants.

  • Yellow: Used paint that has light to medium scratches, heavy compound marks, and swirls.

  • Red: Used paint with heavy scratches, defects, and blemishes.

Prep the Surface: All Conditions

Before you begin compounding or polishing your car’s paint, always clay the surface using Clay Magic.


Clay Magic is used after the vehicle is washed, and picks up any contaminants that have attached to the paint. These contaminants will stick to the clay’s surface, leaving the vehicle’s finish ready to be waxed, polished, or compounded.


Pro Tip: Always use a quality lubricant when claying a vehicle, this ensures the clay will glide smoothly over the vehicles finish. Inspect and knead the clay often to avoid scratches.


Green

Polish the surface of the vehicle with a variable-speed orbital buffer, using a lightly abrasive polish.


Ensure that the polishing pad is centered on the buffer’s backing plate. Also, don’t overload the pads with too much product.


Polish small sections at a time, (think a square the length and width of your forearm). Overlap the sections to ensure complete coverage, and finish the entire body panel. Repeat for each body panel.


Pro Tip: Remove any excess product with Clay Magic and lubricant.


Yellow

Following the same steps above, you’ll start out with a medium abrasive compound.


Compound the entire vehicle with the lightly abrasive product. Remember to remove excess product as you complete each body panel.


Once finished, you will then repeat the process with the lightly abrasive polish. Just as with the Green finish, you’ll go over all the painted surfaces of your vehicle’s finish.


Pro Tip: Don’t turn the polisher/buffer on until the pad is on directly on the paint.


Red

Same as before, except with a third step. You’ll begin the process with a heavier compound. Once done, you’ll repeat the process with the medium and then light polish.


Pro Tip: To avoid burnt edges, spray Xtreme Shine in the jambs and crevices prior to polishing.


Troubleshooting Advice

Here are some common problems that we face when compounding/polishing a vehicle’s surface . . . and how to remedy them.


Swirl Marks

  • Use a foam polishing pad to polish paint with a polisher.

  • Apply a wax with an orbital polisher, or by hand.

  • Use the least aggressive polish for the job at hand.


Pro Tip: Use New Car Glaze or BC2 to polish and Strawberry Wet Wax or Banana Magic to wax.


Spider Webbing in the Paint

  • Mist the surface with Xtreme Shine to keep the dust and dried wax from scratching the paint.

  • Always clean wash mitts prior to washing.

  • Ensure your chamois and/or microfiber towel is clean.

Pro Tip: Rotate towel and mist surface with a spray lubricant to avoid was dusting.

Clean Your Tires, Polish Your Wheels

Clean Your Tires, Polish Your Wheels

How to Clean Your Tires & Polish Your Wheels

As with the rest of your vehicle, the tires, wheels, and trim require their own attention and products. We’re going to be breaking down the process of how to clean your tires, wheels and trim into a couple separate categories to help you keep them in tip-top shape.


Cleaning Your Tires & Wheels

The tires and wheels can be cleaned together, as they have will have a similar build-up of road grit, bake dust, and grime.

It is best to have a designated tire/wheel cleaner, as opposed to any degreaser or household cleaner. Wheel cleaners are specifically designed to clean up road filth, while keeping your rims free of harm.


You’ll also want a quality tire brush, along with a wheel brush based on the type of rims you have. Allow the brushes to soak in a bucket with wash solution, which will help to soften the bristles and lubricate the cleaning process.


Now that you are all set, let’s get those wheels cleaned:

  • Rinse off, and clean the wheel-wells first.

  • Next, spray the wheel and tire down with cleaner and let set for a few minutes.

  • Clean the tires first, using the tire brush.

  • Now clean the wheels, start at the top, using a mitt or brush to get all the nooks and crannies.

  • Rinse thoroughly.

  • Repeat for the other three wheels.

Pro Tip: Use a paint brush to get the grime out from around the lug nuts.


Wondering How to Take Care of Flat Black Rims?


Tire Dressing an Protection

Once your tires are clean and dry, you want to ensure they last until the tread is gone . . . not until they dry-rot. This means you’ll be taking another step, which is to add a protective coating to your tires.


As with interior dressings and protectants, there are numerous choices. You want to ensure that the product apply meets your desired needs and results.


Water-Based Dressing: This is easily applied and will leave behind a clean, satin look. They are milky-white and contain natural oils, along with synthetic polymers which leave behind a UV coating and keep the tire moist. Expect them to last about a week or two, before they need to be reapplied. We recommend Super Dress It.


Solvent-Based Dressing: These dressings are going to be a bit thicker, and will give the tire a wet, glossy finish. Because of the silicone-based delivery system (as opposed to water), they will also last longer and stand up better in harsh weather conditions. Check out our XP Cool Blue.


Pro Tip: Don’t over-apply your tire dressing. Allow to sit for a few minutes, then wipe off any excess to prevent the product from ‘slinging’ onto the surrounding fenders.


Polishing those Wheels

The primary contributor to messing up your wheel’s finish (aside from poor driving) is brake dust. Ensure you do a good job when washing your wheels, to get all this filth off. Once clean, you need to take things a step further to keep your rims in top notch shape. Here’s a few tips on how to properly polish and seal your wheels to keep them looking new for years to come.


Most rims today are made of aluminum, but the similarities end there. We’re going to be looking at the rim’s finish to determine the best way to polish and seal these bad boys.


Clear-Coated Alloy Wheels

With clear-coated aluminum wheels, you’ll want a light polish that cleans and polishes the clear-coat without leaving scratches. In reality, you are restoring the coat applied to the rim.

Pro Tip: If your rims feel rough after a wash, you may want to clay them to remove some of the adhered contaminants. Clay Magic works best on rims . . . and don’t forget a good clay lubricant like Xtreme Shine.


Polished Alloy Wheels

Polished aluminum wheels lack the protective clear-coating, and can tarnish and oxidize. With this in mind, you’ll want to use a polish that is a bit more aggressive.

  • Use a heavier grade abrasive polish like Xtreme Metal Polish.

  • Apply with a polishing pad like buffing ball attached to power drill.

  • Wipe off polish with a clean, microfiber towel.

  • Repeat three more times, unless you have a motorcycle.

Chrome Rims

Chrome wheels are a little bit different, as the chrome is a soft metal coating (chromium) that is adhered to the alloy wheel. Due to the soft nature of chromium, you’re polishing efforts will be rewarded.

Pro Tip: Plastic chrome trim is not metal and the above steps do not apply.


Wax Your Rims

Once you have thoroughly cleaned and polished your wheels, you’ll want to take the final step of protection and apply a wax or sealant. This will enhance the look of your rims and also add a layer of protection from the elements.

  • Apply a polymer sealant or carnauba wax with an applicator pad.

  • Buff the wheel to work in the sealant or wax.

  • Remove any excess with a clean microfiber towel.

Pro Tip: If done regularly, all you’ll need to clean your wheels is water.


Keeping Your Trim & Moldings Looking New

The trim and moldings of your vehicle should have been cleaned during the exterior wash. If any of these areas need extra attention, a little special cleaner and a brush will remove the last bit of stubborn grit and grime.


Now that all the trim and moldings are cleaned, it is time to protect them. This will enhance the look of the vehicle’s exterior and protect from environmental damage. There are several products that will get the job done, ranging from plastic dyes to dressings and detailers. Here’s what you need to know for each of these products.


Plastic Restoration

When plastic trim becomes faded and oxidized, you want to be able to bring it back to like-new condition. This is where plastic restoration products come in handy. They come in two main categories, and can be applied safely with a wax applicator.


For any color trim that you are looking to restore, use a product like Vinyl Magic. Vinyl Magic restores faded door handles, wheel flairs, running boards, bumpers, and many other forms of plastic trims. Vinyl Magic is applied with a was applicator, and will bring new life to your plastic for another 4-6 months.


For all those Jeep owners with an ample amount of black trim and moldings on your vehicle, you can use a black dye and restorer called Black Vinyl Coat. Apply just as you would the above Vinyl Magic, and see for yourself how quickly your faded black trim can be restored.


Detail Spray

These are prevalent, and super easy to use. They are usually a quick-detail type aerosol spray that will give a clean surface a nice shine. Easily applied to any hard surface, they are great for a quick touch-up of those dull areas.


Apply Xtreme Shine like any other spray formula, using a high-quality microfiber towel. Xtreme Shine can also be used on painted surfaces and glass, removing the worry of overspray. It will leave behind a micro-protective layer that is not wet or greasy, instead it gives surfaces a clean luster.


Dressing

Water-based dressings work very well for protection your trim from UV damage. If the plastic is still in good condition, then these dressings will keep things clean and new-looking for years to come.


Pro Tip: You can cut water-based dressings with water to give the surfaces more of a satin finish, for a less slick feeling.


Troubleshooting Advice

Here are few suggestions for some of the more common issues we face when cleaning tires, wheels, and trim.


Tires Have a Brownish Appearance

Understand that this brownish appearance is actually due to a chemical in the tire’s rubber, that helps to prevent the tire from drying out. It is designed to move towards the surface while the tire is spinning. Now that you know what it is, here’s how to get rid of that unsightly stuff.

  • Spray the tire with a Special Cleaner and scrub with a brush to remove any residual dressing.

  • Allow tire to fully dry, then re-clean with Special Cleaner if needed.

  • Once fully dry, apply dressing of choice.

How to Remove Blue Coating from Lettering of Tires


Tar Deposits on Fender Trim, Rocker Panels, or Wheels

  • Hone your skills with Clay Magic to get rid of embedded particulates.

  • Make sure to use a quality lubricant to ensure the clay moves freely on the rims.

  • Rinse and repeat as necessary.

Pro Tip: Use a plastic razor blade to gently remove any build-up.

How to Clean Your Vehicle's Interior

How to Clean Your Vehicle's Interior

Why You Should Clean Your Vehicle’s Interior?

Keeping the inside of your vehicle clean is just as necessary at keeping your paint clean and waxed. You’ll not only prolong the life of the materials inside of the car, but also keep microorganisms from making it their home.


Detailing the inside of your car will make it a safer environment and help to reduce the occurrence of mechanical problems. Dirty and foggy glass reduces visibility, dirty vents spread allergens and dust, and grit can get into buttons and levers.


Keeping your car’s interior clean can be easily done at home. Here’s how you can avoid costly detail, along with repair charges, by doing a bit of the work yourself.


Hard Surface Cleaning

Let’s call the dashboard, door panels, door posts/jams, and center console your hard surfaces. These should be cleaned with a cleaner and light brush or towel.


This is a relatively straight-forward process.


Open up the doors to get the jambs. Scoot the seats back to clean the console and rails. Also, don’t forget about folding down the back seats.


Cleaning the hard surfaces can be done in three simple steps:

  • Lightly mist the area with the cleaning product.

  • Agitate with a brush or towel.

  • Towel dry.

Pro Tip: Use a dry brush first to clean out cracks and crevices, and compressed air works wonders for vents.

Hard Surface Protection

Once all the hard surfaces are cleaned to your liking, it is time to protect them. This will give the interior of your vehicle a shiny, clean look, while also extending the life and color of the surfaces.


There are several products that will get the job done, ranging from a water-based dressing to an aerosol detailer. Here’s the skinny on each of these products.


Water-based Dressing: This is your typical interior/trim protection, think milky in color. It can be easily applied with a spray bottle, and will give your interior surfaces a wet look. It provides UV protection, which is important for surfaces that are constantly in direct sunlight (dashboard).


One downfall of water-based dressing is the slick, glossy feel left behind. Not only can it cause issues if put on the steering wheel, but it also tends to attract dirt particulates.


Aerosol Detailers: These are prevalent, and super easy to use. They are usually a quick-detail type aerosol spray that will give a clean surface a nice shine. Easily applied to any hard surface, they are great for a quick touch-up of those dull areas.


Xtreme Shine: This is our signature detailing product, with versatility to match. It has the UV protection benefits of other detailers/dressings, without leaving behind a greasy finish. It’s anti-static properties actually repel dust particles, keeping your surfaces cleaner and shinier for longer periods of time.


Apply Xtreme Shine like any other spray formula, using a high-quality microfiber towel. Xtreme Shine can also be used on painted surfaces and glass, removing the worry of overspray. It will leave behind a micro-protective layer that is not wet or greasy, instead it gives surfaces a clean luster.


Pro Tip: You can cut water-based dressings with water to give the surfaces more of a satin finish, for a less slick feeling.


Carpets & Upholstery Cleaning

Hopefully by now you’ve disposed of all the random trash that finds itself on the floorboard (wrappers, water bottles, loose change, etc.). Once the big stuff is out of the way, we can begin by vacuuming the carpet and upholstery.


There isn’t much of a mystery to vacuuming, just ensure you cover all areas. Use a crevice attachment to remove the grit from those hard-to-reach, narrow areas.


Pet Hair? Use a pet-hair brush, or you can don a pair of latex gloves . . . pet hair sticks to them like crazy.


For spots or stains on the carpet and seats, use a product like Super Foam. Spray on, brush in, and dry or vacuum out. If it is a specific type stain (oil, coffee, etc.) you can use an enzyme based treatment.


Pro Tip: Use mechanical measures (i.e. brush or vacuum) before chemical treatments (i.e. stain removers or cleaners).


Leather Care

Keeping your leather seats and trim in tip-top shape is of utmost importance. Just as with everything else related to your vehicle, maintenance is key to performance. If neglected, your vehicle’s leather will dry, crack, fade, and prematurely age.


The interior detail isn’t done once your leather is clean. The next step is to treat your leather with a conditioner. Apply your leather conditioner with an applicator sponge. Ensure to work the product into the leather and allow to soak in for 1-2 hours, then wipe off any excess.


Pro Tip: Always use a quality conditioner with lanolin. Cheap conditioners can contain silicone oils or petroleum based distillates, which will leave behind a glossy sheen that can transfer to clothing.


Troubleshooting Advice

Here are few suggestions for some of the more common issues we face when detailing the interior of our vehicles.


Hardened Candy, Dried Gum, and Lipstick

  • Apply Special Cleaner to soften the offending substance.

  • Shampoo, or extract the area.

  • Repeat if necessary.

Grass, Coffee, Juice, and Mildew

  • Mist the area with Enzyme Pre-Spot, allow to sit for a few minutes.

  • Shampoo, or extract the area.

  • Repeat if necessary.


Oil and Grease

  • Soften the offending substance with a Special Cleaner, let set for 1-2 minutes.

  • Agitate area with a scrubbing brush.

Pro Tip: Use a plastic razor blade to gently remove any build-up.

Instrument Panel Lens is Scratched and/or Dull

  • Polish the plastic lens with New Car Glaze to bring back clarity.

  • Use a small amount to avoid excess dust that can get behind the lens.

Pro Tip: Don’t use compressed air, that will push more dust behind the lens.

Washing Your Car the Right Way

Washing Your Car the Right Way

We all want our ride to looks its best. One of the quickest and easiest ways to do this is by washing your vehicle on a consistent basis. Keeping your car clean helps to keep the finish looking new, and that helps to prevent damage from the elements. We'll outline how washing your car the right way makes life a little easier, giving you tips and tricks along the way.


Why Washing Your Car the Right Way is Important

Washing your car the right way is key to preventing swirl marks and extending the life of your paint. Those unsightly swirls are primarily left behind from grit embedding itself in the wash mitt or sponge during the washing process. The key here will be having an additional bucket filled with clean water, you’ll use this to rinse out your mitt before resudsing (a word we just made up).


Now that you know why you should wash your car the right way, let’s look at some easy steps to get that sucker clean and looking good on the road.


Set Up Your Vehicle to Be Washed

Find a cool/shady spot to wash your car. This will keep your car wash solution from drying car before it is rinsed off the car. Also, it is best to wash your vehicle on a calm day. Wind can stir up dust and grit that is attracted to wet surfaces, causing light scratches in the paint.


Begin the car wash process with two buckets. One is for your shampoo solution and the other is clean water to rinse your wash mitt. The majority to swirl marks are caused from grit (sand, dust, particles) embedded in the wash mitt . . . that’s why you’ll be rocking the second, clean bucket of water.


Use high quality car shampoos and wash mitts, your vehicle will thank you!


Fill a 5-gallon bucket ½ full with water. Add the correct amount of wash soap based upon label recommendations. Fill the bucket the rest of the way, agitating the water to fully activate suds. The second bucket will be filled with clean water for rinsing your wash mitt.


Pro Tip: Throw a Grit Guard into each bucket. This will allow the grit to settle on the bottom of the bucket, and not return to your wash mitt.


Pre- Rinse

Cool down the exterior of your vehicle by thoroughly rinsing the surface. This helps to remove the loose dirt and grime prior to washing.


Pro Tip: Use a high-pressure hose nozzle, or a pressure washer, to loosen and remove dirt from the wheels, wheel-wells, and undercarriage.


Wheels

Begin the washing process by cleaning the wheels, along with the wheel wells. This is because you should be using a wheel cleaner/degreaser, and want to be able to wash off any overspray that gets on the paint. It’s good to have a dedicated bucket, sponge, and brush for cleaning the wheels and surrounding area.


Rinse the wheel area. Spray on cleaner/degreaser to the rims and undercarriage. Agitate the areas with a wash mitt/soft brush. Then rinse off. Follow-up with rinsing the tire, applying cleaner to the tire, scrub/agitate with tire brush, and thoroughly rinse off.


Do one wheel at a time. You don’t want the soaps and chemicals to dry on to your rims during the process.


Pro Tip: Use a pump sprayer to easily apply the wheel cleaner/degreaser.


Washing your Vehicle

Now you are ready to wash your car! Load up that wash mitt with some car shampoo (from the sudsy bucket), and wring it out over the surface you are about to wash. This will loosen up the dirt on the surface, and act as a slick barrier to wash off the grime without scratching the paint.


Go small. Keeping the wash areas small allows you to rinse out the wash mitt frequently (in the clean bucket). Plus, it lessens the chance that the soap will dry prior to being rinsed off. After you have washed an area, give it a quick rinse to get rid of the left-over suds.


Always wash your vehicle from top to bottom (except for the wheels). The law of gravity says that the dirtiest areas of your vehicle will be those that are closest to the ground. You don’t want to compromise and scratch the rest of your paint by getting all that grit in your wash mitt.


Circles are out, straight lines are in. Wash in straight, overlapping lines. Remember to use both sides of your wash mitt.


When you get to the bumpers and rocker panels, inspect for bug and road splatter. Use a bug sponge and appropriate cleaner to remove any accumulated junk.


Pro Tip: Foam gun!


Final Rinse

Open up the hose nozzle completely, allowing the water to thoroughly rinse off all the suds. You should have gotten most of the suds off during some of the smaller rinses, but this allows for a final check to make sure you washed everything.


Pro Tip: Let the water sheet off the vehicle, which leaves less water drops behind, allowing the drying process to go quicker. Plus, this lessens the chance of water spots.


Drying Your Car

Start with a high-quality chamois. Gently dry the surface with straight, overlapping swipes. There is no need to apply a lot of pressure, you’re just taking off the majority of the water.


Pro Tip: Use a high quality, micro-fiber towel to remove any remaining droplets or streaks, completely drying the surface to avoid any water marks.


Troubleshooting Advice

Sometimes you run into some seriously nasty grime that doesn’t seem to want to dome off. Here are a few of the most common issues, and how to deal with them like a pro.


Heavy Bug Splat, Bird Droppings, and Tree Sap

  • Cool and rinse the surface with water.

  • Apply a bug remover or cleaner.

  • Agitate with a bug or big boss scrub pad.

  • Rinse thoroughly.

Pro Tip: Clay Magic works wonders with fresh tree sap. Older, hardened tree sap can be removed with isopropyl alcohol.


Tar Deposits & Overspray on Fender Wells, Rocker Panels, and Wheels

  • First, remove dirt and any debris.

  • Apply an ample amount of solvent to the affected area.

    • Solvent cannot be shipped, but it is fairly inexpensive at a local hardware store.

  • Agitate area with a short brush or do-all scrubber.

  • Rinse and repeat as needed.


    Pro Tip: Solvents work best on dry areas. Use a towel or fan to completely dry the area before applying.


    Heavy Water Spots

    • Wash vehicle thoroughly.

    • Spray on water spot remover.

      • The majority of water spot removers are acid based, meaning they cannot be shipped.

    • Agitate with a do-all scrubber.

    • Rinse thoroughly.

    • Re-wash vehicle with soap.


      Pro Tip: Clay Magic works wonders on water spots, and removes the need to work with acid based chemicals.


      Five Steps to Detail Your Car

      Five Steps to Detail Your Car

      We all want our ride to look and perform its best. One of the simplest ways we can go about this is by keeping it, and all its parts, clean. Keeping your car clean helps keep the finish looking new, and will help to prevent damage from the elements. These are our five steps to detail your car.

      Detail Your Car in Five Easy Steps

      For those days that you want to forgo the professional detailer, and get your hands a little sudsy. Here’s the quick-and-easy on how you can go about getting your vehicle to look in tip top shape.


      Five Steps to Detail Your Car image of Mustang GT with icons describing the detail process.

      1. Exterior Prep and Clean

      • Try to wash your vehicle in a cool, shady spot. This helps to reduce the suds drying onto the paint.

      • Begin the car wash process with two buckets. One is for your shampoo solution and the other is clean water to rinse your wash mitt. The majority to swirl marks are caused from grit (sand, dust, particles) embedded in the wash mitt.

      • Fill your buckets. One with a high-quality car shampoo and the other with clean water.

        • Pro Tip: Throw a Grit Guard into the bottom of each bucket.

      • Thoroughly rinse the exterior surface of your vehicle. This will cool down the surface, while removing some the loose dirt and grime prior to washing.

      • Begin the washing process by cleaning the wheels, along with the wheel wells. This will allow you to wash off any of the chemical overspray from the paint.

        • Pro Tip: Use a pump sprayer to easily apply the wheel cleaner/degreaser.

      • Load up that wash mitt with some car shampoo (from the sudsy bucket), and wring it out over the surface you are about to wash.

        • Pro Tip: Foam gun!

      • Wash your vehicle from top to bottom (except for the wheels).

      • Wash in straight, overlapping lines, using both sides of your wash mitt.

      • Rinse each section once you have washed it. You don’t want the suds to dry on the paint.

      • Use a bug sponge and appropriate cleaner to remove any accumulated junk (i.e. bug splatter, overspray, road grime).

      • Thoroughly rinse off all the suds, allowing the water to sheet off the vehicle.

      • Use a high-quality chamois to gently dry the surface with straight, overlapping swipes.

      • Remove any remaining droplets or streaks with a micro-fiber towel.

      Recommended Products:     Wash n Wax     Wash Mitt     Special Cleaner     Bug Sponge     Chamois     Microfiber Towel

         2. Tires, Trim & Moldings

        Clean and Preserve those Tires

        • Have a designated tire/wheel cleaner, as opposed to any household degreaser or cleaner.

        • You’ll also want a quality tire brush, along with a wheel brush based on the type of rims you have.

          • Pro Tip: Soak the brushes in wash solution to soften the bristles.

        • Thoroughly rinse the wheel and wheel-wells first.

        • Spray the wheel and tire down with cleaner and let set for a few minutes.

        • Clean the tires first, using the tire brush.

        • Next, use a wash mitt or wheel brush to clean the rims.

        • Pro Tip: A small brush works well to hit the nooks and crannies near the lug nuts.

        • Rinse thoroughly . . . repeat three more times.

        • Apply a quality dressing to preserve tires, while enhancing the look.

        • Pro Tip: Don’t over-apply the dressing, or it will ‘sling” on to the paint around the wheel-wells.

        • Check out this post if you need to polish those wheels.

        Clean, Restore, and Protect the Trim & Moldings

        • The trim & moldings would have been cleaned during the wash process, but you a use little special cleaner and a brush to remove any stubborn grit and grime.

        • Rinse thoroughly and allow to dry.

        • To protect your freshly cleaned trim & moldings, apply either a water-based dressing, or Xtreme Shine.

          • A wax applicator can come in handy here.

        • If your plastic bits appear faded, you have a couple options:

          • For black, use Black Vinyl Coat to restore and preserve the trim.

          • For any other color, use Vinyl Magic.

          • Both products restore and preserve plastic pieces for up to 6 months.

        Recommended Products: Special Cleaner     Super Dress It     Xtreme Shine     Vinyl Magic     Black Vinyl Coat     Wax Applicator Pad

         3. Restore and Protect Your Vehicle’s Finish

        • Before you begin compounding or polishing your car’s paint, first prep the surface using Clay Magic.

        • Use a variable-speed orbital buffer when compounding/polishing your vehicle’s surface.

          • Pro Tip: Help avoid swirl marks by using a foam polishing pad to polish paint with a polisher.

        • Choose a polish or compound based on the condition of the paint.

          • Mild- Use a lightly abrasive polish like BC-2 for mild imperfections in the paint.

          • Medium- For heavier oxidation and swirl marks, use a more abrasive compound like GS-1.

          • Heavy- For heavy scratches (not to the metal) and paint defects or blemishes, use a heavy compound like XP Compound.

        • Polish small sections at a time, overlapping the sections to ensure complete coverage to finish the entire body panel.

          • Pro Tip: Don’t turn the polisher/buffer on until the pad is on directly on the paint.

        • Based upon the condition of your paint, you’ll step down to the next level of compound/polish.

          • Start with heavy compound, then move to a medium compound, followed up with a mild polish.

          • Pro Tip Make sure to remove any excess compound residue with a microfiber towel.

        • If the polish/compound did not contain a surface protectant, use a high-quality wax to give your paint a showroom shine.

        Recommended Products: BC-2     Xtreme Shine     Clay Magic     GS-1     XP Compound     Rupes Orbital

        4. Engine Compartment & Undercarriage Cleansing

        Ungrime that Engine

        • Make sure engine is not hot, but warm to the touch.

        • Cover all electronics (distributor, sensors, wiring harnesses, etc.).

        • Soak engine and compartment with a degreaser, allow to sit for a few minutes.

        • Use a stiff brush to help remove the really baked-on stuff.

        • Using a controlled stream of water, rinse off the degreaser.

        • Allow to dry.

        • Apply water-based dressing to plastic housings, wires, and hoses.

          • Use a microfiber towel to wipe off any excess.

          • Pro Tip: Use an aerosol detailer, like Platinum Shine, to add luster to any of the painted and metal surfaces.

        Ungrit your Undercarriage

        • Elevate vehicle on jack stands, to get underneath.

          • Unless you have a monster truck, you my friend have it easy.

        • Use a pressure washer to blast off any and all debris that has accumulated under your vehicle.

        • Thoroughly coat undercarriage with degreaser, let sit for several minutes.

        • Use a brush to clean any heavily accumulated areas.

        • Rinse thoroughly, and allow to dry.

        • Add a protective barrier to your car’s bottom.

          • A rubberized undercoat is great for shielding your vehicle’s underbits from moisture and grime.

          • Pro Tip: You can also use a product like WD40 to help prevent corrosion on your car’s undercarriage.

        Recommended Products: 777 Degreaser     Super Dress It     Platinum Shine

         5. Complete Interior Detail

        • Use a brush to get any embedded dirt out of the crevices.

        • Spray a multi-purpose cleaner, like Special Cleaner, onto all your hard surfaces (dashboard, door panels, door posts/jams, center console, etc.).

        • Wipe off with a microfiber towel.

        • Pro Tip: Compressed air works great for cleaning out the vents.

        • To protect the hard surfaces from UV damage, use a product like Super Dress It.

          • Xtreme Shine works great for leaving a clean surface, without that slick feel. Its anti-static properties also repel dust.

        • Time to break out the vacuum.

          • Use a crevice attachment to remove the grit from those hard-to-reach areas.

        • Pro Tip: Lots of pet hair? Put on a latex glove and run your hand over the upholstery.

        • Use Super Foam to lift up any spots or stains on the carpet of upholstery.

          • Spray on.

          • Brush in.

          • Vacuum out.

        • Pro Tip: For specific stains (protein, oil, etc.) you can use and Enzyme based treatment.

        • Use Vinyl & Leather cleaner to remove any dirt from . . . you guessed it, vinyl and leather.

        • Treat your leather with a quality leather conditioner.

          • Apply your leather conditioner with a microfiber towel or a wax applicator.

          • Work the product into the leather, and wipe off any excess.

        • Pro Tip: Always use a quality conditioner with lanolin.

        Recommended Products: Special Cleaner     Super Dress It     Xtreme Shine     Super Foam     Vinyl & Leather Cleaner     Leather Conditioner


        Our brands